Category Archives: Technology

A little audio section & notes

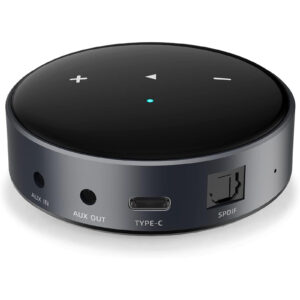
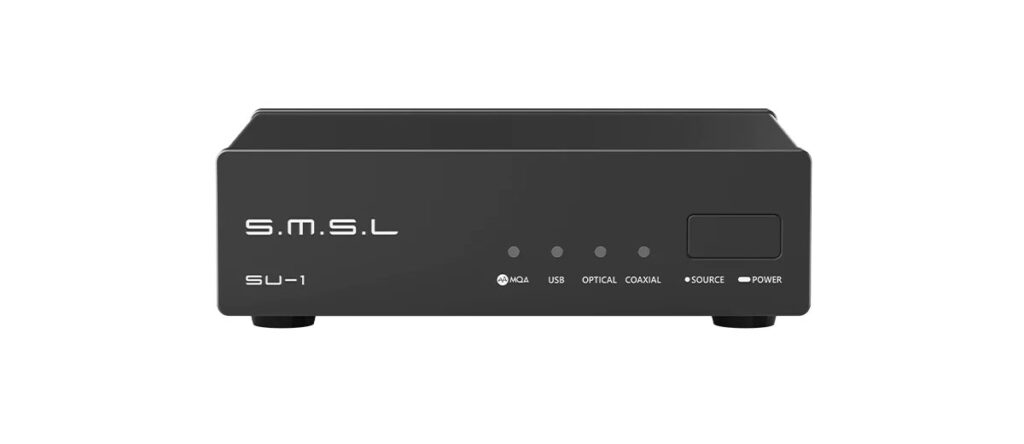
I use a couple of Wiim products at home for music streaming – a Mini in my home office, and a Pro in the lounge. Both are using S.M.S.L. SU1 DACs.

The Wiim Pro is a Chromecast capable device – pretty much anything can be used to control it and stream. The Mini is not Chromecast. Both have a web API, and a UPnP interface. I was able to find some projects on Github that show how to build code to drive these from Linux, or as ready apps to use.

https://www.wiimhome.com/pdf/HTTP%20API%20for%20WiiM%20Mini.pdf – API doccumentation

https://wiki.gnome.org/Projects/GUPnP – a Linux based UPnP set of tools for discovery and experimentation. Very helpful with building and debugging UPnP code when working with devices like the Wiims

https://github.com/retired-guy/WiiM-Watcher-Chrome-Extension – Chrome js. Check out some of the other examples from this user too.

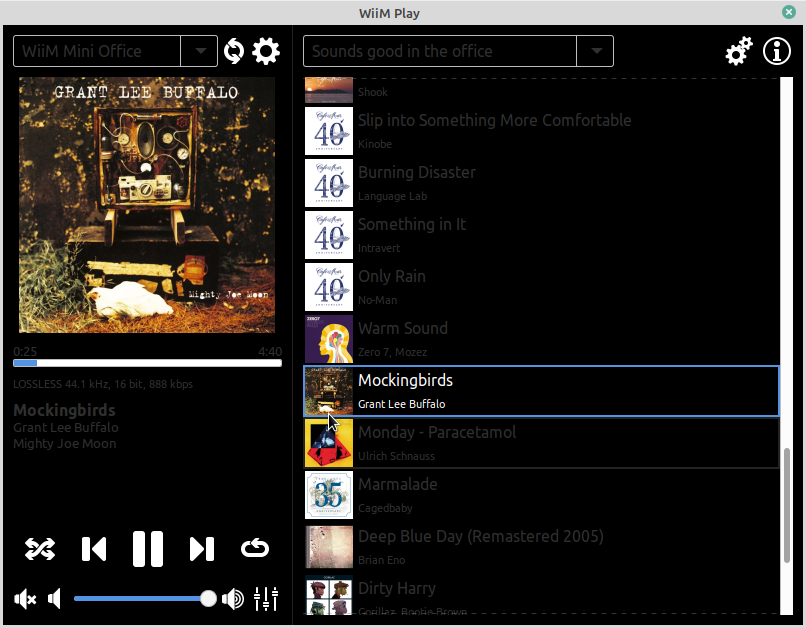
https://github.com/shumatech/wiimplay – app written in Go, runs great on Linux. Precompiled binary available


Wiim Play driving my office Mini from a Linux desktop

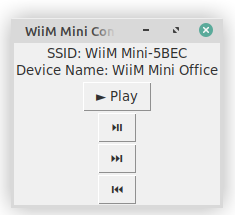
Simple Python Demo for a Wiim Mini control
Enter the IP address of your Wiim device into target_ip

You need to have started the Wiim playing something via a phone / tablet with Wiim Home / Tidal / Spotify. The app allows the user to pause / play / skip to the next or previous track.


# Begin

import tkinter as tk
import requests
requests.packages.urllib3.disable_warnings()


# Specify the IP address here
target_ip = "192.168.1.72"

def get_now_playing():
    url = f"https://{target_ip}/httpapi.asp?command=getStatusEx"
    response = requests.get(url, verify=False)
    data = response.json()
    return data

def play():
    url = f"https://{target_ip}/httpapi.asp?command=setPlayerCmd:resume"
    response = requests.get(url, verify=False)
    update_ui()

def pause():
    url = f"https://{target_ip}/httpapi.asp?command=setPlayerCmd:onepause"
    response = requests.get(url, verify=False)
    update_ui()

def next_track():
    url = f"https://{target_ip}/httpapi.asp?command=setPlayerCmd:next"
    response = requests.get(url, verify=False)
    update_ui()

def previous_track():
    url = f"https://{target_ip}/httpapi.asp?command=setPlayerCmd:prev"
    response = requests.get(url, verify=False)
    update_ui()

def update_ui():
    now_playing = get_now_playing()
    ssid = now_playing.get("ssid", "Unknown SSID")
    device_name = now_playing.get("DeviceName", "Unknown Device")

    status_label.config(text=f"SSID: {ssid}\nDevice Name: {device_name}")


def create_buttons(root):
    char = chr(0x25BA)    
    play_button = tk.Button(root, text=char + " Play", command=play)
    play_button.pack()
    char2 = chr(0x23EF)
    pause_button = tk.Button(root, text=char2, command=pause)
    pause_button.pack()
    char3 = chr(0x23ED)
    next_button = tk.Button(root, text=char3, command=next_track)
    next_button.pack()
    char4 = chr(0x23EE)
    prev_button = tk.Button(root, text=char4, command=previous_track)
    prev_button.pack()

def main():
    root = tk.Tk()
    root.title("WiiM Mini Control")

    global status_label
    status_label = tk.Label(root, text="")
    status_label.pack()

    create_buttons(root)
    update_ui()

    root.mainloop()

if __name__ == "__main__":
    main()

Retro Casio Protrek PRT70 ‘open’ fix

Years ago I took my Protrek PRT70 for a new battery at a local mall battery replacement kiosk. Later when I collected it, the person manning the kiosk said the watch showed a ‘open’ message on the dislay and that I would need to read the manual and reset it.

The reset process in the manual didn’t make the ‘open’ message go away.

I used the watch for months afterwards, the analogue section keeping good time, but the digital section useless and annoying not be be functional.

After a lot of searching online for the symptoms I found a couple of forum posts with the same symptoms on other Casio watches – a tiny contact spring had obviously fallen out while the battery was being replaced at the kiosk – probably not noticed by the tech.

I searched a long time to see if I could find a source for the tiny spring without success – I cut a single strand of a wire that I could use as a substitute – I had to experiment with the multiple potential holes in the watch module until I identified the proper hole.

The wire hack solved the open message and I could resume using the watch again.

I still was looking out for a proper spring replacement as the bodge job was still a pretty ugly hack.

A few years later I found another forum post where some of the users had taken apart a watch spring bar – the spring inside was just about the right size and worked well as a substitute.

Following the notes on the forum post I got the thinnest spring bar I could find on AliExpress (1.3mm x 14mm). Ordered and delivered a couple of days later – probably one of the quicked AliExpress deliveries I’ve ever had!

Again the forum post notes helped – a pair of pliers at each end of the spring bar pulled it apart easily and gave up the tiny spring inside.

Even this tiny spring was too large for the spring hole in the watch module – I was able to gently screw it into the hole until it bottomed out. I gave it a quick test with the back of the watch hand held and verified the ‘open’ message was not there. I trimmed off the excess height of the spring with a pair of craft scissors and replaced the back with the screws in this time.

Awesome to have my ~25 year old faithful watch properly fixed

Home Office Setup

Working from home during Covid lockdowns has some challenges – this is what I have done in my home office to make a difference.

Elements:

Desk – a kitset desk from Treasurebox. Nothing too fancy

Floor pad – DIY project made from click together hardwood flooring – protects the carpet and provides a solid base for the chair to roll on. I saw the idea on Pinterest. It really works well!

ChairHummer. One of the better investments I’ve made. I struggled sitting for long periods in my previous chair which was a budget model, and this one is so comfortable and highly adjustable. I wish I had got this earlier.

Green Plant Wall – an artificial green wall sized at 1.5m2 from a garden centre. It gives me a nice contrasting background behind my monitors and encourages me to focus beyond which helps eye fatigue. I also have a small artificial plant on top of the PC – it was my first touch of green in the office.

Audio – Logitech z333. Sounds good for working with music in the background. The sub isn’t too big and provides more than enough sound. I also have headphones

Webcam – Logitech C920 HD. Works very well with Teams and other conferencing software. Works perfectly under Linux and has a great camera that provides a good image under most lighting conditions

Monitors – Main one is a good 23″ with a bright crisp display. Secondary is a 22″. Both monitors are 1920×1080 in a side by side configuration giving a total desktop area of 3840×1080, and use either display port or DVI. I also have a 10″ tablet on a UGreen stand to the left – this is handy sometimes for a web page display as required.

PC – an upcycled ex-lease 3rd generation i7. I’ve given it a birthday with 16gb RAM, a SSD for the main drive with a large HD for the backup and secondary working. The PC is running Linux Mint 100% with a native version of Teams for most online work. I also use RDP to connect with my Windows box on my desk at work.

Network – domestic fibre connection running at around 920Mbps. The PC has a direct ethernet connection to the hub in the office.

Work in progress / To Do List – cable management!

Cheap GamePad Under Linux

I wanted a cheap gamepad to play TuxCart on my Linux desktop – found a PowerPlay Gamepad PC / PS3 / PS2 for NZ$25 at the red sheds.


On plugging into a USB port I could see the device recognised as a Xbox360 gamepad, but with no outputs.

A bit of google searching for the fix:

Simple fix: https://github.com/fcorsino/gamesir-g3w-fix

Make a python script, save onto desktop as fixgamepad.py:

#!/usr/bin/env python3
import usb.core
import usb.util
dev = usb.core.find(find_all=True)
for d in dev :
    
   if d.idVendor == 0x045e and d.idProduct == 0x028e :
       d.ctrl_transfer(0xc1, 0x01, 0x0100, 0x00, 0x14)

Run it as sudo via a script .sh file
sudo python3 /home/graeme/Desktop/fixgamepad.py
You may need to download the Python USB interface

This initialises the gamepad with some bytes that lets it then be seen by Linux

Make a new file in 
/usr/share/X11/xorg.conf.d/50-joystick.conf

As follows:

Section "InputClass"
  Identifier "joystick catchall"
  MatchIsJoystick "on"
  MatchDevicePath "/dev/input/event*"
  Driver "joystick"
  Option "StartKeysEnabled" "off" # Disable mouse support of joypad 
  Option "StartMouseEnabled" "off"
EndSection

This stops the gamepad pretending to be a mouse.

I also installed Xboxdrv from the Package Manager as the driver, the gamepad seems a bit hit and miss with the stock xpad kernel driver.

I use JSTest GTK to test the inputs, and QJoypad to configure keyboard mapping for it.

Review – Sunroad Altimeter / Barometer

I found this on Aliexpress, NZ$36 approx – multiple sellers with the product


My interest was a device with barograph function. Plenty of devices available with pressure trend, but I specifically wanted a barograph.

Sampling is every 30 minutes for the graph which is a reasonable interval, there is a specific barometer mode where the readings are ‘live’ but not graphed. The barometer seems consistent once it’s calibrated. One issue that has shown up is when there are significant changes in pressure, the graph scale doesn’t change – leaving historic data points ‘off chart’ until they age and exit stage left

Powered by a built in battery recharged via a USB port. Seems to last a while on one charge – mine is over two months and still going strong and showing a full charge. The USB port is charging only, while it would be cool if you could connect and harvest data… maybe another version or two into the future.

OK quality, the only concern is USB port used for charging seems to be floating rather than fixed in place. Reading the manual this could be by design. It clearly isn’t waterproof, maybe splashproof at best.

The device also does altitude / compass / temperature and humidity, plus a time and alarm function. It does have an annoying beep with every button press – nothing in the manual if it can be disabled (doubt it!)

Verdict – interesting device to keep on my desk.
I’ll update as I get to know it a little better!

Aliexpress link: https://www.aliexpress.com/item/32888977040.html?spm=a2g0s.9042311.0.0.3da24c4dpu1YUM

Making old…new again

This is a record of me getting a cheap laptop up and running for my personal use at work.

Selection Criteria

  • The laptop had to be cheap
  • Robust
  • Easy to work on e.g. I can add drives and RAM myself
  • Run Linux

New laptops are generally not cheap, this meant I had to look at some low spec ‘education’ type laptops, Chromebooks, or go second hand.

I looked at some low specification education laptops, and decided they were not what I was wanting. The screens were low resolution, and they had limited hardware.

Chromebooks were quite interesting, and I was quite attracted to their ecosystem, being able to run Linux. Again, unless I wanted to spend quite a bit of money the specifications were not particularly good.

Second hand can be tricky – you don’t know the hardware will be good, the laptop could have been dropped, spilled upon, breathed smoke or any number of possibilities. Ex-lease laptops can be pretty good, they are sold off cheap at the end of their lease and the value of them has been depreciated. Plenty of re-sellers get these, clean them up, install a fresh copy of Windows and sell them off to punters like me.

Going through the available models was interesting, I googled each model with reference to Linux to gauge how easy it would be for me to set up, and then did a search for material about working on the hardware.

Cult of ThinkPads

Then I found the cult of ThinkPads. This was me. Built like a proverbial brick shit house, very popular in the Linux world, and well supported in both hardware and documentation available from Lenovo.

My choice was a Lenovo ThinkPad T420. It was a reasonable specification with a SSD, i5-2520m, 4gb of RAM and a few options including the 1600 x 900 screen, a WAN card, and a wifi card that covers both 2.4 and 5 Ghz bands. The SMART stats on the SSD showed only 200 boot cycles.

I used the Windows install on it to update the bios to the latest version from Lenovo, before formatting the SSD and installing Linux Mint 19.2 Mate onto it.

The install was good, default options all the way through, and no additional drivers required. I did have one very minor issue of screen tearing in Chrome – solved via a helpful redditor

I added tlp and powertop (power management tools)

sudo add-apt-repository ppa:linrunner/tlp
sudo apt-get update
sudo apt-get install tlp tlp-rdw
sudo apt-get install tp-smapi-dkms acpi-call-dkms
sudo apt-get install tlpui
sudo apt-get install powertop

Another stick of 8gb RAM was added (Crucial CT102464BF160B) to the existing 4gb to bring the total RAM up to 12gb. Later on I’ll add a larger SSD that might be a little faster than the current.

Perfect!

I’ve set up the work vpn and remote desktop access onto my work PC without too much drama, which gives me just about everything at my fingertips when using the T420… I’ve even had some complimentary remarks from workmates on it. It certainly stands out among the HP Ultrabooks and Macbook Airs at work!

With the network at work I had to add some Windows domain name resolution so I could use internal URLs –

Set up name resolution on a Windows network (work VPN)

sudo apt install winbind libnss-winbind
sudo nano /etc/nsswitch.conf and look for the line:

hosts: files mdns4_minimal [NOTFOUND=return] dns

Change that line to:

hosts: files mdns4_minimal [NOTFOUND=return] dns wins mdns4

Save and close the file.

I got an ultrabay SSD adaptor from ebay, and when it arrived I cloned the existing 120gb SSD onto a fresh 500gb SSD using CloneZilla, moved the 120 to the ultrabay (replacing the DVD drive), and the new 500gb into the main drive bay. I formatted the 120gb and set it up as the backup drive for Timeshift snapshots.